
| 일 | 월 | 화 | 수 | 목 | 금 | 토 |
|---|---|---|---|---|---|---|
| 1 | 2 | 3 | 4 | 5 | 6 | |
| 7 | 8 | 9 | 10 | 11 | 12 | 13 |
| 14 | 15 | 16 | 17 | 18 | 19 | 20 |
| 21 | 22 | 23 | 24 | 25 | 26 | 27 |
| 28 | 29 | 30 |
- 게임서버
- 좌표
- 이미지
- 리사이즈
- 노선
- streaming
- multiparty
- 데이터
- 이미지서버
- 이미지프로세싱
- 지하철역
- S3
- Node
- ProudNet
- nodejs
- Sharp
- 버킷
- 화소
- Thumbnail
- 아날로그영상
- AWS
- Bucket
- 튜토리얼
- 샘플링
- lightsail
- 프라우드넷
- resize
- 시작하기
- 스트리밍서버
- 디지털영상
- Today
- Total
Deep Studying
Node js와 AWS로 이미지 서버 만들기 (2) 이미지 로드와 업로드 본문
이전 글: Node.js와 AWS로 이미지서버 만들기 (1) AWS 버킷 세팅하기
지난 포스트에서는 버킷을 생성하고 테스트로 이미지를 업로드 해보았습니다.
이번 포스트에서는 express의 router를 사용하여 이미지를 업로드, 로드할 수 있는 단순한 서버의 형태로 만들어보겠습니다.
이번 예제에서 이미지를 업로드할 때, 테스트 해보기 가장 쉬운 multipart form 형태로 진행하겠습니다.
이전 포스트에서 bucket을 잘 생성했다면
Bucket 이름, Bucket 도메인, 엑세스 키 ID, 엑세스 키 네 정보를 기억해주도록 합시다.
설명이 필요 없다면 바로 4번으로 넘어가서 코드만 확인해보실 수 있습니다.
1. 프로젝트 생성
npm init
npm install --save express aws-sdk multiparty
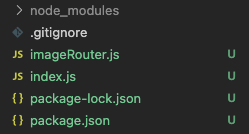
touch index.js imageRouter.js
이번 프로젝트에서 작성할 코드는 index.js와 imageRouter.js 두 개 입니다. 우선 아래 코드를 넣어주세요.
index.js
const imageRouter = require('./imageRouter.js')
const express = require('express')
const app = express()

const PORT = 3000
app.use('/image',imageRouter)
app.get('/upload',function(req, res){
    const body = `
<html>
  <head>
      <meta http-equiv="Content-Type" content="text/html; charset=UTF-8" />
  </head>
  <body>
      <form action="/image" enctype="multipart/form-data" method="post">
          <input type="file" name="file1" multiple="multiple">
          <input type="submit" value="Upload file" />
      </form>
  </body>
</html>
`
	res.writeHead(200, {"Content-Type": "text/html"});
	res.write(body);
	res.end();
})

app.listen(PORT, function(){
	console.log(`running image server on ${PORT}`)
})
express로 서버를 실행하고, imageRouter에 작성한 라우터를 /image 도메인에 등록하는 코드입니다.
중간의 app.get('/upload' ... ) 는 이미지 업로드의 테스트에 사용할 페이지입니다.
필요에 따라서 변형해서 사용하셔도 되며 테스트 후에는 지워도 무방합니다.
imageRouter.js
const router = require('express').Router()
const url = require('url')
const AWS = require('aws-sdk');

const BUCKET_NAME = 'bucket-h3v3bu'
const BUCKET_URL = 'bucket-h3v3bu.s3.ap-northeast-2.amazonaws.com'
AWS.config.update({
    region:         'ap-northeast-2',
    accessKeyId:    'AKIATIIKUHVXRN7EW2MV',
    secretAccessKey:'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'
})

router.get('/*', function(req, res){
	res.end()
})
router.post('/', function(req, res){
	res.end()
})

module.exports = router
이전 포스트에 작성한 것 처럼 본인의 bucket에 맞는 값들을 채워주세요.
2. 이미지 로드하기
가장 단순한 방법으로 이미지 서버에 들어온 요청을 버킷 도메인으로 리다이렉션 시키는 방법이 있습니다.
router.get('/*', function(req,res){
    const {pathname} = url.parse(req.url, true)
    res.redirect(`https://${BUCKET_URL}${pathname}`)
})
imageRouter의 get요청을 위와 같이 처리해줍니다.
http://localhost:3000/image/sample.jpg 라는 url로 get 요청을 보낸다면
pathname에는 /sample.jpg가 남으며
https://<버킷 도메인>/sample.jpg로 리다이렉션하는 코드입니다.

위에 보이는 lightsail console에서 이미지를 직접 업로드 해보시고
인터넷 창에 http://localhost:3000/image/<파일 이름> 을 입력하여 이미지를 잘 불러오는지 확인합니다.
3. 이미지 업로드하기
imageRouter.js문서에서 post 요청을 처리하는 함수를 설명 순서대로 고쳐나갈 것입니다.
3-1. multipart form 처리하기
3-1의 코드는 아래 링크에 나온 내용의 일부를 변형한 것입니다. 자세한 내용은 아래 레퍼런스를 참고해주세요.
https://www.npmjs.com/package/multiparty
multiparty
multipart/form-data parser which supports streaming
www.npmjs.com
router.post('/',function(req, res){
    const form = new multiparty.Form()
    // 에러 처리
    form.on('error', function(err){
        res.status(500).end()
    })
    // form 데이터 처리
    form.on('part', function(part){
        if(!part.filename)
            return part.resume()
        console.log(part.filename)
        part.resume()
    })
    // form 종료
    form.on('close', function(){
        res.end()
    })
    form.parse(req)
})
imageRouter의 post요청을 위와 같이 처리해줍니다.
이제 http://localhost:3000/upload 로 접속하면 아래와 같은 테스트 페이지를 볼 수 있습니다..
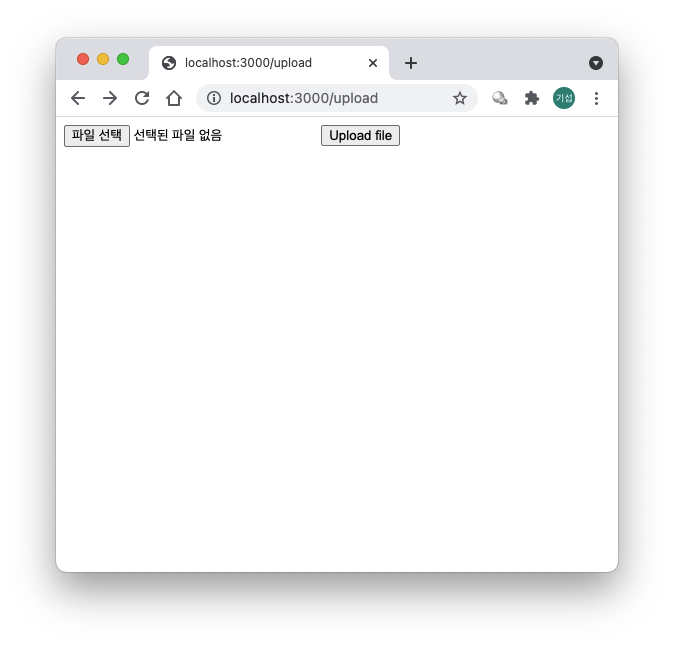
파일 선택을 클릭하여 이미지를 선택한 후 Upload file 버튼을 클릭해봅시다.
서버 콘솔에 내가 업로드한 파일의 이름이 출력되는 것을 확인할 수 있습니다.
여기서 기억해야할 주의깊게 봐야할 내용은 part.resume( ) 함수 입니다.
form은 여러 part를 가지고 있을 수 있는데 해당 part의 동작을 끝내려면 해당 stream을 모두 읽어 close시켜야합니다.
파일만 전송하는 경우 자연스럽게 해결되겠지만 form에는 항상 file 정보만 온다는 보장이 없으므로
현재 part가 file이 아닌 경우, 혹은 file을 전송받지 않을 경우 part.resume( )으로 해당 part를 넘겨야합니다.
3-2. AWS로 업로드하기
AWS.S3.ManagedUpload( )는 버킷 스토리지에 파일을 업로드하는 함수입니다. 그 인자에 사용하는 값을 보겠습니다.
이해가 잘 안되시면 Key 부분만 읽고 넘어가셔도 크게 문제될 것은 없습니다.
Key는 저장할 디렉토리와 파일 이름을 포함한 String입니다.
'sample.jpg' 라는 값을 넣으면 버킷의 홈 디렉토리에 sample.jpg라는 이름으로 업로드할 것이며
'image/sample.jpg' 라는 값을 넣으면 버킷의 홈 디렉토리에 있는 image 디렉토리에 sample.jpg라는 이름으로 업로드 될 것입니다.
Body는 업로드할 파일 내용에 해당하며 readStream을 인자로 받습니다.
part는 readable한 PathTrough 스트림이며 form에 올린 파일을 읽는 stream처럼 사용되기 때문에 인자로 사용할 수 있습니다.
ContentType은 업로드할 콘텐트의 타입을 지정합니다.
이를 생략하면 이미지를 업로드 하더라도 해당 url로 접근했을 때, 이미지를 브라우저에 띄워주는 것이 아니라 파일 형태로 다운로드 받게 됩니다.
3-3. part 스트림을 AWS에 연결하기
form의 part 이벤트 핸들러 부분을 아래와 같이 수정합니다.
    // form 데이터 처리
    form.on('part', function(part){
        if(!part.filename)
            return part.resume()

        const filename = part.filename
        const params = { Bucket:BUCKET_NAME, Key:filename, Body:part, ContentType: 'image' }
        const upload = new AWS.S3.ManagedUpload({ params });
        upload.promise()

        part.on('end', function(){
            // 파일 업로드 후 실행할 추가 코드
            // ...
            // ...
        })
        part.on('error', function(err){
            console.log(err)
        })
    })
상황에 맞춰 filename과 end 이벤트 핸들러 두 가지만 커스텀하여 사용해도 다양한 경우 처리가 가능합니다.
filename
filename은 어떠한 String 값이 와도 무방합니다.
위의 예시처럼 업로드할 때의 파일이름을 그대로 쓸 수도 있고 앞에 디렉토리 이름을 붙여도 됩니다.
end 이벤트 핸들러
part.on('end')로 표현되는 이벤트 핸들러에는 파일의 업로드가 완료된 후 실행할 내용이 올 수 있습니다.
콘솔에 로그를 출력, DB에 정보를 저장하기 등등 상황에 맞는 비즈니스 로직을 실행하시면 됩니다.
3-4. 테스트
다시 http://localhost:3000/upload 페이지로 돌아와봅시다.

파일을 선택하고 Upload file을 누르면

선택했던 sample.jpg 파일이 업로드된 것을 볼 수 있습니다.
4. 정리
프로젝트 생성 및 패키지 인스톨
npm init
npm install --save express aws-sdk multiparty
touch index.js imageRouter.js
index.js
const imageRouter = require('./imageRouter.js')
const express = require('express')
const app = express()

const PORT = 3000
app.use('/image',imageRouter)

// 테스트를 위한 api. 없어도 동작에 문제 없습니다.
app.get('/upload',function(req, res){
    const body = `
<html>
  <head>
      <meta http-equiv="Content-Type" content="text/html; charset=UTF-8" />
  </head>
  <body>
      <form action="/image" enctype="multipart/form-data" method="post">
          <input type="file" name="file1" multiple="multiple">
          <input type="submit" value="Upload file" />
      </form>
  </body>
</html>
`
  res.writeHead(200, {"Content-Type": "text/html"});
  res.write(body);
  res.end();
})
app.listen(PORT, ()=>console.log(`running image server on ${PORT}`))
imageRouter.js
const router = require('express').Router()
const multiparty = require('multiparty')
const url = require('url')
const AWS = require('aws-sdk');
const BUCKET_NAME = 'bucket-h3v3bu' // Bucket 이름
const BUCKET_URL = 'bucket-h3v3bu.s3.ap-northeast-2.amazonaws.com' // Bucket 도메인
AWS.config.update({
    region:         'ap-northeast-2',
    accessKeyId:    'AKIATIIKUHVXRN7EW2MV', // 엑세스 키 ID
    secretAccessKey:'0/00kRKGuHR16RHFljQJXgvgrzBUCh7FID7ZMupx' // 엑세스 키
})

router.get('/*', (req,res)=>{
    const {pathname} = url.parse(req.url, true)
    res.redirect(`https://${BUCKET_URL}${pathname}`)
})

router.post('/',function(req, res){
    const form = new multiparty.Form()
    // 에러 처리
    form.on('error', function(err){
        res.status(500).end()
    })
    // form 데이터 처리
    form.on('part', function(part){
        if(!part.filename)
            return part.resume()

        const filename = part.filename // 버킷에 올라갈 디렉토리+파일의 이름
        const params = { Bucket:BUCKET_NAME, Key:filename, Body:part, ContentType: 'image' }
        const upload = new AWS.S3.ManagedUpload({ params });
        upload.promise()

        part.on('end', function(){
            // 파일 업로드 후 실행할 추가 코드
            // ...
            // ...
        })
        part.on('error', function(err){
            console.log(err)
        })
    })
    // form 종료
    form.on('close', function(){
        // 모든 파일 업로드 후 실행할 추가 코드
        // ...
        // ...
        res.end()
    })
    form.parse(req)
})

module.exports = router
'웹서버' 카테고리의 다른 글
| Node.js로 음악, 동영상 스트리밍 서버 만들기 (0) | 2021.09.04 |
|---|---|
| Node js와 AWS로 이미지 서버 만들기 (3) 이미지 리사이즈, 썸네일 생성 (0) | 2021.08.28 |
| Node js와 AWS로 이미지 서버 만들기 (1) AWS 버킷 세팅하기 (0) | 2021.08.19 |


